
Bing Maps
I built a model of their house, and decided I'd also like to model the billboard.
Grandpa bought the house in the 1940s, and started a business, Bob Smith's Restaurant Supply. He also built a store next to the house, with a two-story warehouse behind. After the business was sold, the house was used for storage; it was taken down sometime in the 90s or early 2000s. The billboard was removed in 2019. Before they were removed, I had taken some photos of the house and buildings, some of which show the billboard. Also, I was able to capture images from GoogleMaps and BingMaps, using streetview to get a few more images of the sign, as in the photo above (The store and warehouse structure are still there, though have been altered recently). I also captured photos from satellite view to figure out overall placement and site information.

From these, I embarked on the attempt to model the billboard and it's location next to the house. Although I didn't have exact measurements, Google Maps has a distance function that let me get pretty good footprint dimensions and location.
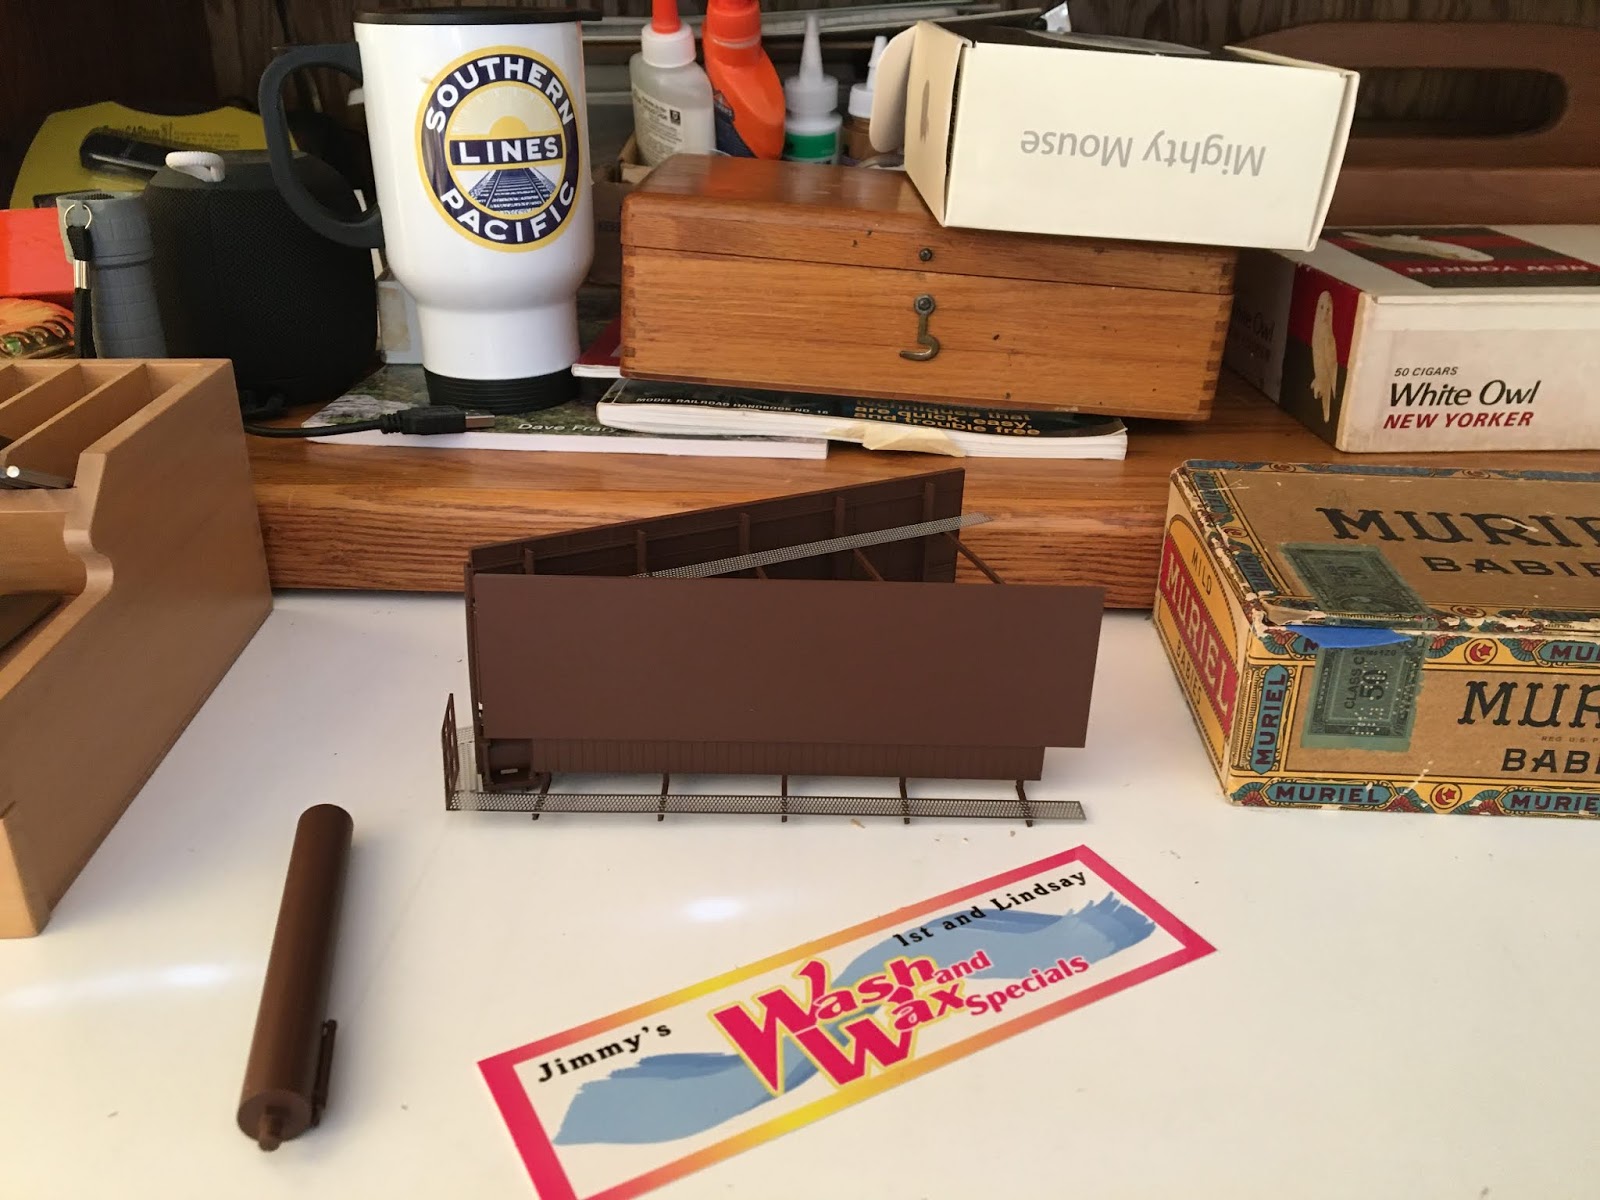
I decided to base the model on a kit bash of BLMA's Modern Dual-Sided Billboard. The billboard next to the house was single-sided, and uses a single support column instead of the two support I-beams, but after looking at the information about the kit, I thought it would be a good basis for a kit-bash. As a clinician at a recent NMRA-PSR convention in Mesa, AZ said, "A kit is nothing but a box of parts".
When I got the kit, it turned out that except for the support column, it came already assembled!

But I figured I could cut it up and use the pieces for a kit bash anyway. So I guess "A model is nothing but a bunch of parts after deconstruction"!
Since the rear of the billboard will be very visible next to the house, I wanted to add some detail that I could see by looking closely at the photos and images I had. The model included lots of really nice cast-on details for the support structures, and neat etched-metal walkways. I pored over my photos and images, and figured I could use them to add additional upright and walkway support elements, to make the rear look busier. The real thing looks a lot more cluttered than BLMA's model!


The additional parts I needed were the diamond-shaped fishplates on the back of the sign, the ladder on the side, and the I-beam supports. I also used styrene strips and scale lumber I had on hand to fashion some of the parts of the billboard.
Then I made an assembly plan...


All images Paul Wilfong unless otherwise noted.
Grandpa bought the house in the 1940s, and started a business, Bob Smith's Restaurant Supply. He also built a store next to the house, with a two-story warehouse behind. After the business was sold, the house was used for storage; it was taken down sometime in the 90s or early 2000s. The billboard was removed in 2019. Before they were removed, I had taken some photos of the house and buildings, some of which show the billboard. Also, I was able to capture images from GoogleMaps and BingMaps, using streetview to get a few more images of the sign, as in the photo above (The store and warehouse structure are still there, though have been altered recently). I also captured photos from satellite view to figure out overall placement and site information.

An Old Photo Showing The Billboard, Hard By The House
 Google Maps

From these, I embarked on the attempt to model the billboard and it's location next to the house. Although I didn't have exact measurements, Google Maps has a distance function that let me get pretty good footprint dimensions and location.
I decided to base the model on a kit bash of BLMA's Modern Dual-Sided Billboard. The billboard next to the house was single-sided, and uses a single support column instead of the two support I-beams, but after looking at the information about the kit, I thought it would be a good basis for a kit-bash. As a clinician at a recent NMRA-PSR convention in Mesa, AZ said, "A kit is nothing but a box of parts".
But I figured I could cut it up and use the pieces for a kit bash anyway. So I guess "A model is nothing but a bunch of parts after deconstruction"!
Since the rear of the billboard will be very visible next to the house, I wanted to add some detail that I could see by looking closely at the photos and images I had. The model included lots of really nice cast-on details for the support structures, and neat etched-metal walkways. I pored over my photos and images, and figured I could use them to add additional upright and walkway support elements, to make the rear look busier. The real thing looks a lot more cluttered than BLMA's model!

Bing Maps
The tools I used for the project were NWSL Chopper, a MicroScale Magnetic Gluing Jig, a cutting pad, and the standard collection of knives, tweezers, squares, scale rulers, etc.
I started out by cutting up the model:
- Removed catwalks; easy to gently lift off supports.
- Snipped inside cross supports where they meet the sign bottom, where the joint is at an angle.
- Separated the two sign halves from the support structure.
- Detached catwalk support cradles from torsion bar; easy - they were lightly glued.
- At one end, the torsion bar had a piece that the support column fits in to. I pried it off; a bit hard, had to use forceful persuasion as gently as I could.
- The torsion bar was encased in two places, by the parts that were the connections to the support column. I removed the one at the very end of the bar - the other would be used for one of the support I-beams. This was a tough operation. The piece was essentially a ring that the bar fit through, and was glued tight, and I couldn't pry it off directly. I broke the ladder attached to it while trying and used an X-Acto chisel blade to remove the rest of the ladder pieces. So I sliced through the ring at the 3 o'clock and 9 o'clock positions, again using the chisel blade, and then was able to pry off the two resulting halves independently. These halves would be reattached on the other side of the torsion bar, for the I-beam support on that side of the billboard.
I found a website to help identify names of the various billboard components: The Anatomy Of A Billboard.
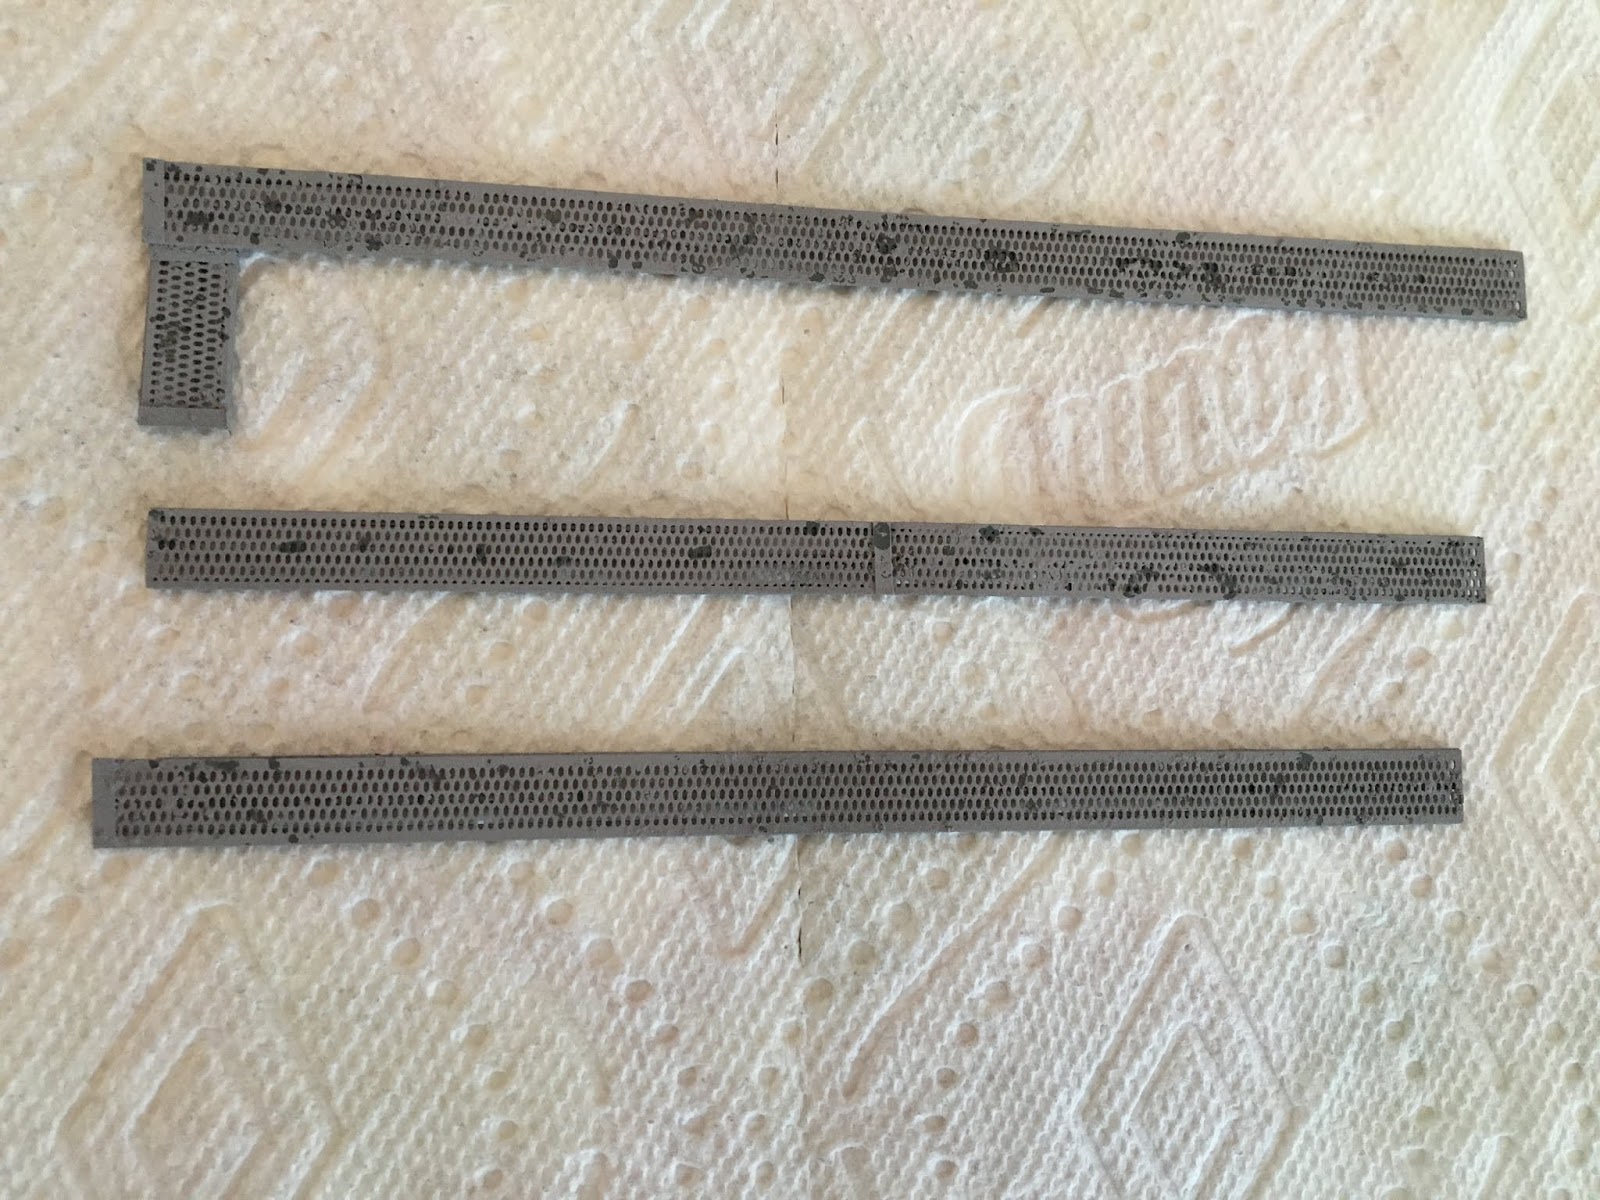
Now I had also the parts necessary to start the build of the billboard.

Parts After Deconsruction
I used our computer printer to scan the back and sides of the billboard. Using my photos and images to guide me, I drew the elements that I wanted to include in the model.

Backside With Markup - Google Maps

Side With Markup - Google Maps
The additional parts I needed were the diamond-shaped fishplates on the back of the sign, the ladder on the side, and the I-beam supports. I also used styrene strips and scale lumber I had on hand to fashion some of the parts of the billboard.
Then I made an assembly plan...
- Glue left I-beam support "ring" (from the deconstruction) to the torsion bar on the side opposite from the first, placed to maintain symmetry.
- Trims & sand original catwalk lower supports, aka outriggers, so they fit snug against the vertical uprights on the back of the sign. Also smooth the original attachment points.
- Glue diamond fishplates at beam joints on the back off the sign.
- Glue bottom rear outrigger supports to the torsion bar, using their cradles, as originally attached, but at different locations on the bar which is to be centered behind the sign. These were used for this purpose in the original model, but the bar was offset in that case.
- Glue lower outriggers to vertical uprights, at the original attachment points.
- Trim upper outriggers to length, sand ends, sand upper connections on uprights.
- Glue upper outriggers to uprights; these are lower than the original model had them, to more closely match the actual billboard.
- Measure and cut vertical support boards and horizontal boards to be used for the safety barriers for the rear catwalks.
- Cut catwalks to shape.
- Glue stringer beams under catwalk - one along the center, the other two along the sides. Also glue I-beam supports to torsion bar connectors.
- Glue catwalks to outriggers; lower (front and rear), then upper (rear only).
- Glue ladder and end barrier to catwalks.
- Glue wood safety barrier supports to the ends of the lower and upper outriggers, and glue the horizontal boards to them.
Step 1: I expected to be able to use styrene glue for building up the model, but immediately ran into a setback: The glue would not work on the model's plastic! (I used Tamiya's "extra thin cement"). I looked on the internet for assistance, and posted the issue to the MR website. I also tried to contact BLMA, but it turns out they don't seem to be in business anymore. Athearn, who bought the model's tooling, didn't know what kind of plastic was used for the model. Unfortunately I didn't have any luck with any of this, so I ordered Bondene and Plastic Weld glues from Plastruct, hoping one of them would work. While I was at it, I also ordered some I-Beam and ofter styrene strip material, then waited for delivery.
The project was on hold for a while, until the delivery arrived. Based on Plastruct's description of Bondene, I expected it to work, but it did not. Luckily the Plastic Weld was successful. Unlike styrene, the joints don't bond immediately and have to be set aside for a while after gluing until the bond hardens.
I glued the "ring" structure to the torsion bar as planned. The ring had spread slightly and would not fit snugly around the torsion bar, so I did my best to tighten the fit and applied the Plastic Weld, rather generously. After drying, the bond held, but was not strong, and there were gaps where the two ring halves came together, and also between the ring and the torsion bar. I had planned to fill these with epoxy, but in recent MRs Cody Grivno had described using gel ACC for this, so I tried it out. It worked well, filling the gaps and providing substatial strengthening.
Step 2: I filed and sanded the ends of the catwalk lower supports, and also the back of the billboard where I'd cut off the upper catwalk supports.
Step 3: I used styrene strip material, .010x.080", which was about 18" wide in HO scale. I used the NWSL chopper to cut a piece as close to square as I could. Then the diagonal measurement was HO 21". Using the photos of the billboard's backside, I estimated the actual diagonal to be between 16" and 19", so my version is a little oversize, but it seemed to look ok when test-fitted on the billboard's backside.
I chopped a number of squares, and using a dot of Hob-e-Tac at the backside locations, which were the crossings of the beams molded to the back. This allowed initial placement and adjustment, to ensure they were properly aligned with the beams and one another. After judging the arrangement look ok, I flooded the edges with Plastic Weld, and waited a while for the glue to dry.

Step 4: To glue the torsion bar to the billboard, I used an ad-hoc magnetic glueing jig to hold the bar and billboard in place, to ensure I would get the proper orientations.

I then flooded Plastic Weld where the backside of the billboard pressed against the torsion bar. I let it dry overnight, and the next day found it to be holding together pretty well. I added some dabs of super glue jell to fill some gaps, and to strengthen the joints.
Steps 5, 6 & 7: First I glued the lower outriggers to the vertical uprights, at the original attachment points. Then I measured the length of the top catwalk supports, and cut the pieces from the original top supports to match (3'). The length was determined so that the ends would line up with the lower supports below them. I used the NWSL Chopper to make five supports, and glued them to the vertical beams on the billboard backside. I used an HO figure to determine a good height. I used an ad-hoc magnetic gluing jig to position the first support against the vertical beams, checking the vertical and horizontal alignments. Magnets held a pair of clamping tweezers, which in turn held the support piece in place, pressing against the vertical beam.

I applied gel super glue to one support end, and used the jig setup to position the support so that the end pressed against the vertical beam. After fifteen minutes, I carefully removed the tweezers and checked that the support alignment looked ok. I then repeated the process for four remaining supports. After a couple of hours, I applied another little bit of gel superglue to the joints, and the next morning, flooded them with Plastic Weld.
Step 8: I used the billboard supports to determine the wood support post's measurements, and used them to draw a diagram of the wood barrier structure. I cut HO 4x4" wood strips for the vertical posts and 2x4" strips for the horizontal rails, and painted them brown. After the paint dried, I used some old Floquil driftwood stain as a wash, then used my drawing as a template to glue the structure together.
Interlude: At this time I started thinking about the catwalk setup and realized I had a problem. The catwalks on the model are made from thin aluminum sheet, and were in V-shapes to match the dual-billboard geometry. I thought I'd be able to cut the straight catwalk sections for the rework, but found only the two outer catwalks had straight parts that were long enough. So I would be ok for the front and rear lower catwalks, but I needed a third, for the upper rear catwalk!
Another issue was that, while looking at this problem, I realized that the two lower catwalks were different levels! On the side of the prototype, a small length of catwalk joins the front and rear catwalks, but the ladder goes from the lower front catwalk up to the lower rear catwalk, and then up to the upper rear catwalk. Up to this point I'd thought the front, rear and side segments were all the same level. So I would have to alter the side setup a bit.

Step 8: I measured and cut strip wood for the rear catwalk barriers, using HO 4x4" wood strip for the vertical posts and 2x4" for the horizontal barriers. I painted them brown, then applied some Floquil driftwood stain.
Steps 9 & 10: I used some old tin snips I'd got decades ago from my father. They cut the model's aluminum grate material used for the catwalk quite nicely. I was able to cut two long pieces from the original model catwalks, but there wasn't a long enough piece for the third, so I cut two half-lengths and glued them together. I also cut a short piece for the end walk as shown in the sketch above. I used .010" styrene to dress the ragged ends, and Evergreen HO 4x4" styrene strip for the three support beams, which I glued to the metal catwalks.
Interlude: At this point I had a number of subcomponents: The billboard, the catwalks, and the wood catwalk barriers. I decided it would be a good time to do the painting and weathering, since I wanted the billboard and the catwalks to be slightly different shades of gray, which is how they look to me in the photos. Also at this point, the substructures were still relatively sturdy for handling.
I used Model Master Light Sea Gray for the billboard; the photos have some tan coloring and this paint seemed to me to have some of that coloring also. I decided to use the salt crystal method on the catwalks to simulate water spot corrosion; I used Ace Gray Primer for the catwalk under-coat, and Rustoleum Auto Primer for the catwalk over-coat (a lighter gray).
I also cut the I-beams for the billboard supports and glued them to the torsion bar. Then I was ready for painting; here is the result...


At this point I noticed with great disappointment that the billboard was not aligned properly with the torsion bar. Those who advocate the use of photos to spot flaws in their modeling are spot-on! I actually noticed the problem as I was about to take the first photo, and even though I thought I'd carefully inspected the work for this kind of thing previously, it wasn't until just before I pressed the button to take the photo that it jumped out at me. But the glue was set hard at this point and I decided it was going to have to be good enough. As time goes on, though, I know it'll bug me whenever I look at it.
I also decided to add two boards to the back of the sign that represent boards that appear to be used for structural support on the billboard, apparently to keep the sign from sagging. As usual, it's hard to be sure from the indistinct photos I have, but it looks like the part of the billboard that holds the sign is actually tapered so that it is thicker at the bottom and thinner at the top. And there appear to be rods that probably pull back on the top of the sign and to make sure it doesn't sag forward. So I thought I'd add the boards that support the rods, but decided I didn't want to tackle the rods themselves. I hope to be able to use the boards for lighting, perhaps. I'll hold off glueing them to the billboard rear, though, until I obtain the lighting parts.
At this point I decided to weather the billboard. I used pan pastels, and was happy with the results on the catwalks. But the results on the back of the billboard looked too blotchy. So I used dull cote to fix the pastels and repainted with the Model Master sea gray, and tried the pan pastels again with very light applications, and the results seemed better to me.
The back of the billboard has a yellow-tan tint in the prototype pictures, and I tried to capture that with a thin wash of bronze yellow acrylic. The paint tended to pool wherever there were edges, so the models's color was not as uniform as in the prototype photo. But I like the results anyway. Below are the prototype photo to the left, and the model to the right.

Unfortunately I'm finding out that the support legs attached to the torsion rod elements are just not strong. They are butt joints, so it's not surprising. I didn't want to add extra bracing to strengthen the connections, since the prototype did not have any. I tried super glue, Plastic Weld, and two-part epoxy. The legs still kept separating from the torsion bar no matter which glue I tried. And the epoxy left small blobs around the joint. I left them there hoping the extra surface then available for bonding would provide the additional strength needed. But nothing solved the issue, so I continue to have a weak attachment of the support legs to the torsion bar.
Step 3: I used styrene strip material, .010x.080", which was about 18" wide in HO scale. I used the NWSL chopper to cut a piece as close to square as I could. Then the diagonal measurement was HO 21". Using the photos of the billboard's backside, I estimated the actual diagonal to be between 16" and 19", so my version is a little oversize, but it seemed to look ok when test-fitted on the billboard's backside.
I chopped a number of squares, and using a dot of Hob-e-Tac at the backside locations, which were the crossings of the beams molded to the back. This allowed initial placement and adjustment, to ensure they were properly aligned with the beams and one another. After judging the arrangement look ok, I flooded the edges with Plastic Weld, and waited a while for the glue to dry.

Fishplates Attached To The Backside Of The Billboard
Step 4: To glue the torsion bar to the billboard, I used an ad-hoc magnetic glueing jig to hold the bar and billboard in place, to ensure I would get the proper orientations.

Setup of Torsion Bar And Billboard Held In Place Using An Ad-Hoc Magnetic Gluing Jig
Steps 5, 6 & 7: First I glued the lower outriggers to the vertical uprights, at the original attachment points. Then I measured the length of the top catwalk supports, and cut the pieces from the original top supports to match (3'). The length was determined so that the ends would line up with the lower supports below them. I used the NWSL Chopper to make five supports, and glued them to the vertical beams on the billboard backside. I used an HO figure to determine a good height. I used an ad-hoc magnetic gluing jig to position the first support against the vertical beams, checking the vertical and horizontal alignments. Magnets held a pair of clamping tweezers, which in turn held the support piece in place, pressing against the vertical beam.

Ad-Hoc Jig Setup To Position Top Catwalk Supports For Gluing
Step 8: I used the billboard supports to determine the wood support post's measurements, and used them to draw a diagram of the wood barrier structure. I cut HO 4x4" wood strips for the vertical posts and 2x4" strips for the horizontal rails, and painted them brown. After the paint dried, I used some old Floquil driftwood stain as a wash, then used my drawing as a template to glue the structure together.
Interlude: At this time I started thinking about the catwalk setup and realized I had a problem. The catwalks on the model are made from thin aluminum sheet, and were in V-shapes to match the dual-billboard geometry. I thought I'd be able to cut the straight catwalk sections for the rework, but found only the two outer catwalks had straight parts that were long enough. So I would be ok for the front and rear lower catwalks, but I needed a third, for the upper rear catwalk!
Another issue was that, while looking at this problem, I realized that the two lower catwalks were different levels! On the side of the prototype, a small length of catwalk joins the front and rear catwalks, but the ladder goes from the lower front catwalk up to the lower rear catwalk, and then up to the upper rear catwalk. Up to this point I'd thought the front, rear and side segments were all the same level. So I would have to alter the side setup a bit.

Catwalk Sketch Showing Multiple Levels And Ladder Setup
Step 8: I measured and cut strip wood for the rear catwalk barriers, using HO 4x4" wood strip for the vertical posts and 2x4" for the horizontal barriers. I painted them brown, then applied some Floquil driftwood stain.
Steps 9 & 10: I used some old tin snips I'd got decades ago from my father. They cut the model's aluminum grate material used for the catwalk quite nicely. I was able to cut two long pieces from the original model catwalks, but there wasn't a long enough piece for the third, so I cut two half-lengths and glued them together. I also cut a short piece for the end walk as shown in the sketch above. I used .010" styrene to dress the ragged ends, and Evergreen HO 4x4" styrene strip for the three support beams, which I glued to the metal catwalks.
Interlude: At this point I had a number of subcomponents: The billboard, the catwalks, and the wood catwalk barriers. I decided it would be a good time to do the painting and weathering, since I wanted the billboard and the catwalks to be slightly different shades of gray, which is how they look to me in the photos. Also at this point, the substructures were still relatively sturdy for handling.
I used Model Master Light Sea Gray for the billboard; the photos have some tan coloring and this paint seemed to me to have some of that coloring also. I decided to use the salt crystal method on the catwalks to simulate water spot corrosion; I used Ace Gray Primer for the catwalk under-coat, and Rustoleum Auto Primer for the catwalk over-coat (a lighter gray).
I also cut the I-beams for the billboard supports and glued them to the torsion bar. Then I was ready for painting; here is the result...

Painted Billboard
Painted Catwalks With Water Spots
I also decided to add two boards to the back of the sign that represent boards that appear to be used for structural support on the billboard, apparently to keep the sign from sagging. As usual, it's hard to be sure from the indistinct photos I have, but it looks like the part of the billboard that holds the sign is actually tapered so that it is thicker at the bottom and thinner at the top. And there appear to be rods that probably pull back on the top of the sign and to make sure it doesn't sag forward. So I thought I'd add the boards that support the rods, but decided I didn't want to tackle the rods themselves. I hope to be able to use the boards for lighting, perhaps. I'll hold off glueing them to the billboard rear, though, until I obtain the lighting parts.
At this point I decided to weather the billboard. I used pan pastels, and was happy with the results on the catwalks. But the results on the back of the billboard looked too blotchy. So I used dull cote to fix the pastels and repainted with the Model Master sea gray, and tried the pan pastels again with very light applications, and the results seemed better to me.
The back of the billboard has a yellow-tan tint in the prototype pictures, and I tried to capture that with a thin wash of bronze yellow acrylic. The paint tended to pool wherever there were edges, so the models's color was not as uniform as in the prototype photo. But I like the results anyway. Below are the prototype photo to the left, and the model to the right.

Back Of Billboard - Prototype (on left) vs. Model
Unfortunately I'm finding out that the support legs attached to the torsion rod elements are just not strong. They are butt joints, so it's not surprising. I didn't want to add extra bracing to strengthen the connections, since the prototype did not have any. I tried super glue, Plastic Weld, and two-part epoxy. The legs still kept separating from the torsion bar no matter which glue I tried. And the epoxy left small blobs around the joint. I left them there hoping the extra surface then available for bonding would provide the additional strength needed. But nothing solved the issue, so I continue to have a weak attachment of the support legs to the torsion bar.
Step 11: I glued the three catwalks to their supports.
Step 12: I had ordered Kadee freight car ladders to use for the catwalk ladder on the side of the billboard. In pictures of Kadee's ladder, it looked like the side rails and rungs were very thin, like the prototype ladder. I ordered from a source that took forever to deliver, so after a while I also put in an order at the local hobby shop (Reed's in La Mesa), and it wasn't too long before they got it in. When they arrived I was pretty happy with the thinness I'd hoped for.
I painted the ladders, and also some pieces from the original model to use for the end catwalk barrier and support, and cut to size as necessary. Then I glued the ladder pieces and end barriers to the end catwalk.
Step 13: Finally, I positioned the wood safety barrier pieces against the rear catwalks and their supports, and used super glue to fix them in place.
These photos show the results, including an initial mock-up of the way the billboard will look placed next to the model of my Grandfather's house, similar to the way it was in my old photographs, and in my memory.


End Results, Including Mockup Of Scenes With House
There are a number of misalignments that can be seen in these photos, that I wish I'd been alert enough to have noticed them earlier in the construction, when they could have been fairly easily corrected. Again I'll say - Your camera is your friend! There are also rough areas and the I-Beam support connections with their epoxy blobs. But I think the flaws don't detract much from the way it turned out.
With the busy look of the back of the billboard, and how it overwhelms the house the way I remember, I really like the end result of this build.
No comments:
Post a Comment